

One window. Four steps.
The boring half of your edit, gone.
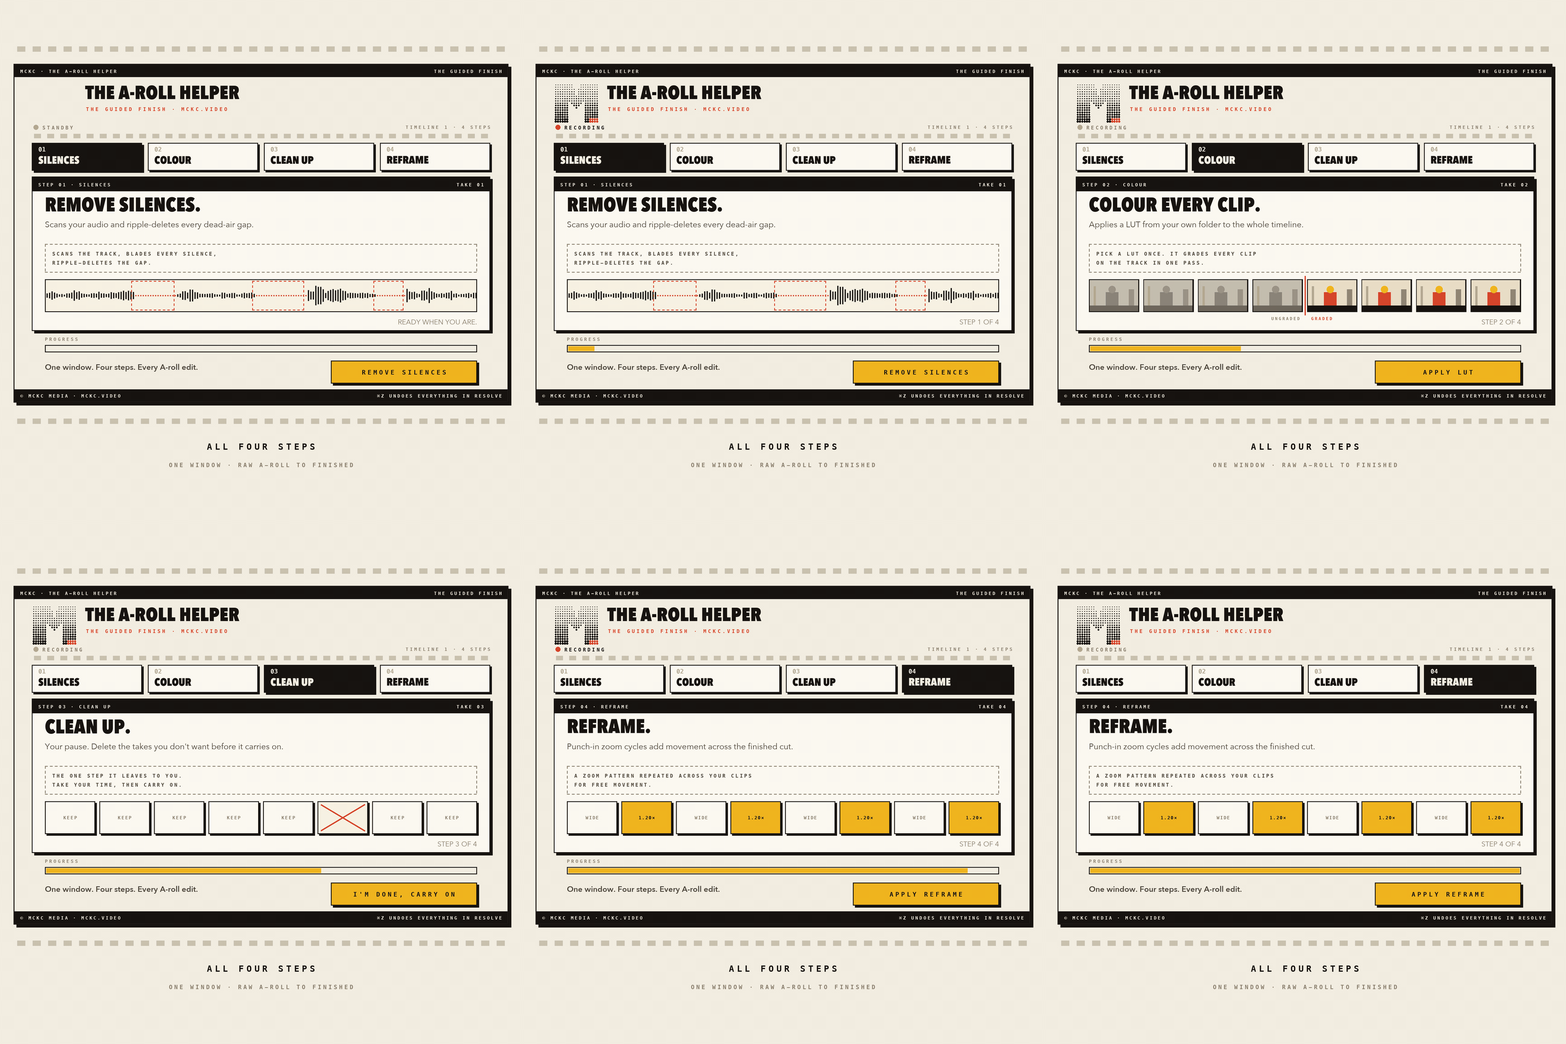
Every A-roll edit starts with the same forty minutes of admin. Cut the dead air. Drop a LUT on every clip. Tidy up. Add some punch-ins. The A-Roll Helper does all four inside one guided window in DaVinci Resolve, and Cmd+Z undoes the lot.
HOW IT WORKS
The four things you do every single time.
In the order you already work. Each step is one screen, and you drive it. Nothing runs off on its own.
STEP ONE
Remove silences.
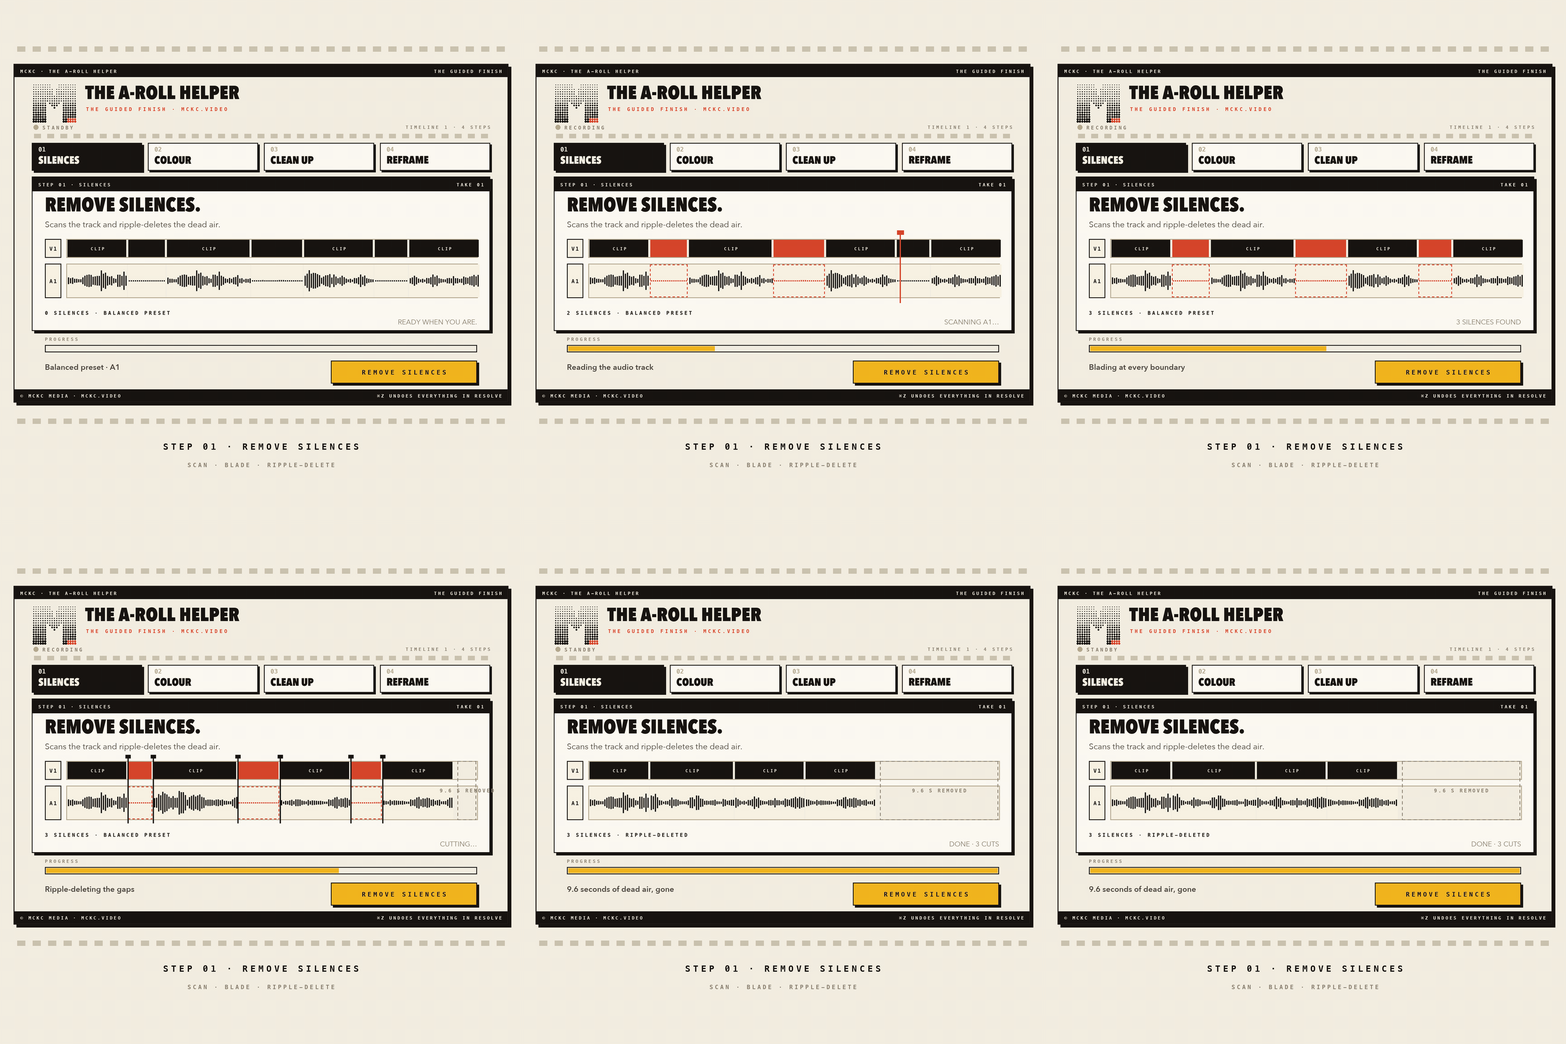
It scans your audio track and ripple-deletes the dead air. Pick Snappy for tight, Balanced for natural conversation, or Relaxed if you mumble and want your whispers to survive.
Not sure? Run it as Just mark them first. You get red markers showing exactly what it would cut, with nothing touched. Happy with them? Switch to Cut and run it again.
STEP TWO
Colour your clips.
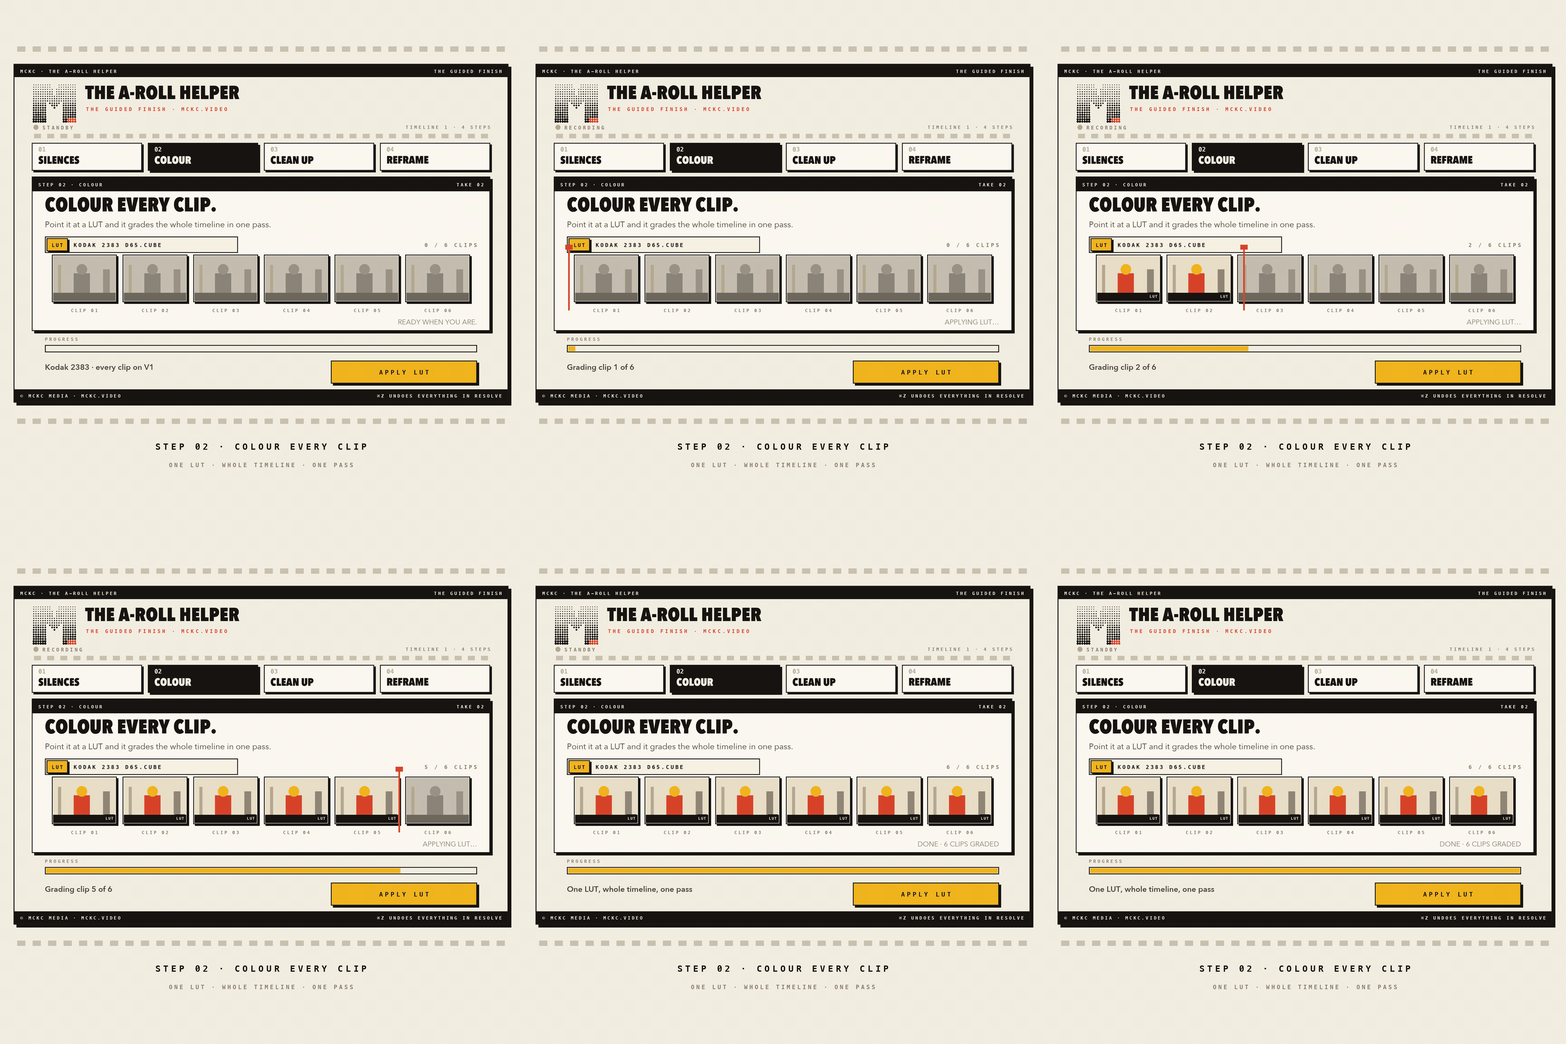
The LUT list wires itself to Resolve’s own LUT folder, so your packs are already sat there. Pick one, apply it to every clip on the timeline in one go.
Titles and generators get skipped automatically, so you are not undoing a LUT off your lower thirds afterwards. Choose all video tracks, or just one.
STEP THREE
Clean up.
No automation here, on purpose. This is your pause to delete the takes where you fluffed the line, said the wrong brand name, or sneezed.
The panel shows a live clip count so you can watch it drop as you work, and you press Continue when you are happy. That is the whole step. Some things should not be automated and knowing which takes are keepers is one of them.
CLIPS ON TIMELINE
48
DELETE WHAT YOU DON’T WANT · PRESS CONTINUE
STEP FOUR
Reframe.
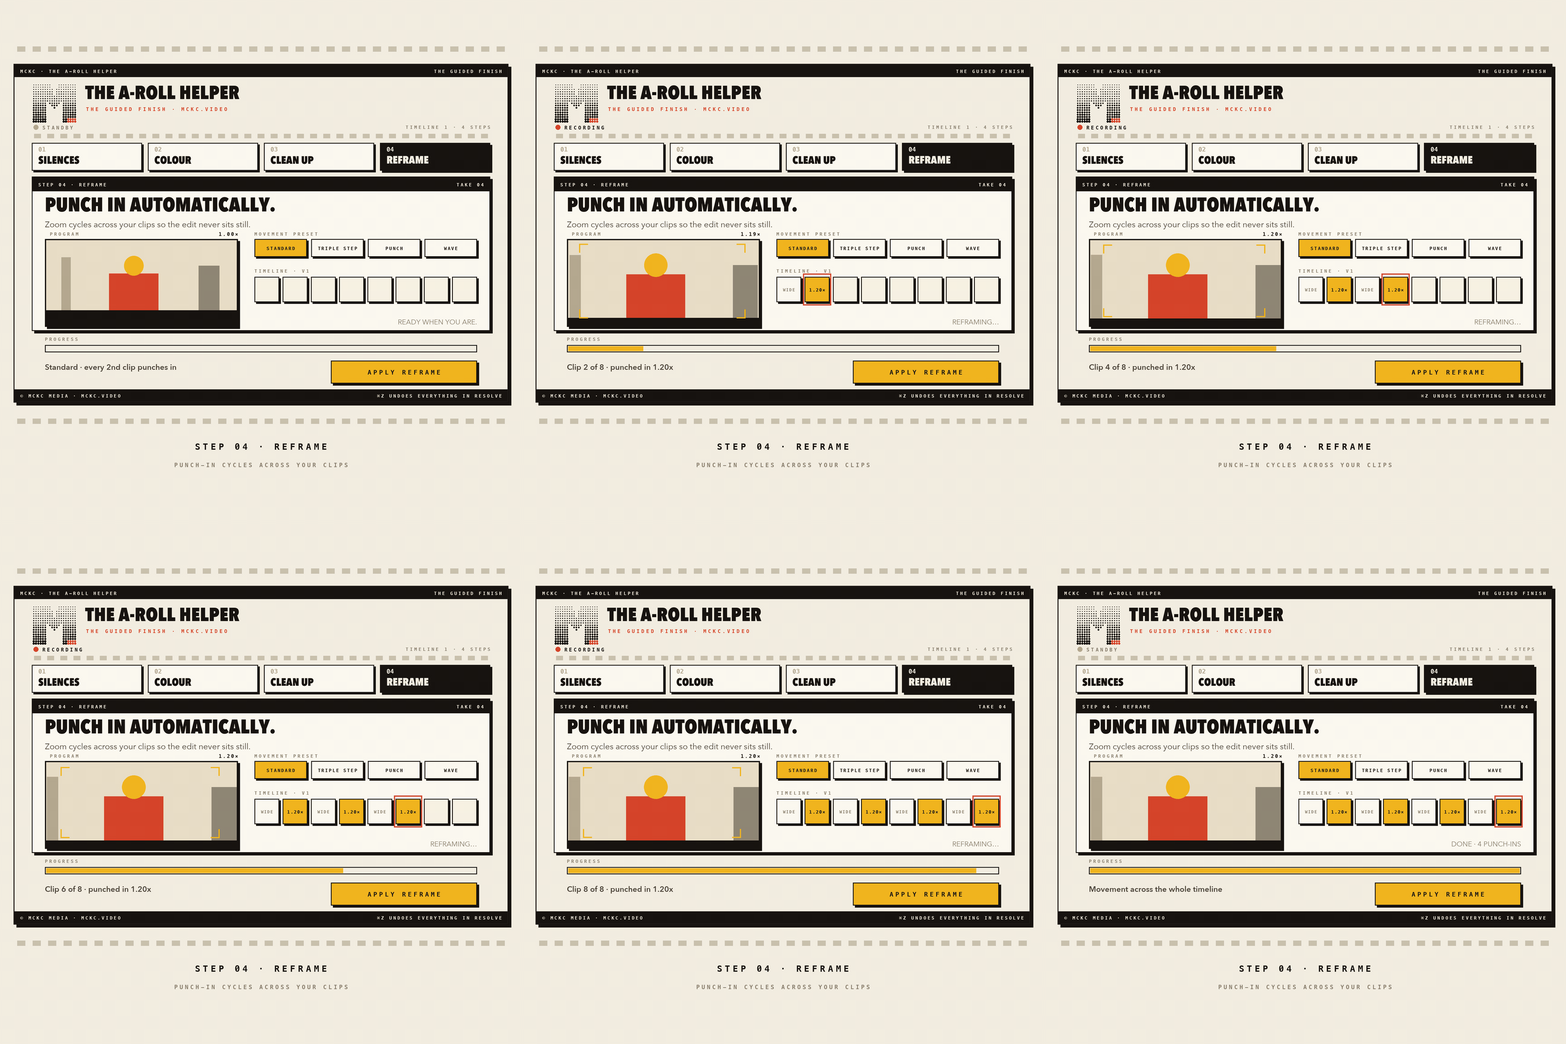
Punch-in zoom cycles across your clips so the edit keeps moving instead of sitting on one static shot for nine minutes. Standard punches every other clip, or pick Triple Step, Punch or Wave.
Set how deep the punch goes. Advanced adds pan and tilt so your face stays centred as it zooms, plus a dry run that logs exactly what it would do without touching a thing.
NO BLACK BOX
It’s all just a normal Resolve edit.
Nothing here is a weird sidecar file or a format only this plugin understands. Every step does what you would do by hand, with Resolve’s own tools, which means one thing that matters more than any feature on this page:
⌘Z undoes all of it.
Don’t like the punch-ins? Undo. Cut too aggressive? Undo, change the preset, run it again. You are never one click away from a project you have to rebuild.
RANGE CONTROL
Work on part of a timeline, not all of it.
Every step has an “Only between In & Out points” switch. Tick it and that step touches nothing outside your range.
Each step remembers its own setting, so you can cut silences across the whole timeline but only grade the middle section. Three ways to set the range:
- Set In and Out in Resolve the normal way with I and O, then tick the switch.
- Grab the playhead - park it where you want and click the button.
- Type the timecode straight into the IN and OUT boxes.
01:00:05:0001:04:22:11WHAT YOU NEED
- macOS - Apple Silicon and Intel. Windows is not supported yet.
- DaVinci Resolve 18.5 or newer - the free version and Studio both work.
- That is genuinely it. The installer sorts out Python and ffmpeg for you.
- About two minutes.
WHAT’S IN THE DOWNLOAD 80 KB
install.commanddouble-click installer, checks your setuparoll_helper/the plugin itselfPreview UI.commandclick around the interface against a fake timelineSTART HERE.mdquick start, the four steps, troubleshootingLICENCE.txtsingle-user licence, every machine you personally work on
FREE UPDATES FOR THE LIFETIME OF THE PRODUCT.
THE HONEST BIT
Two things worth knowing before you buy.
I would rather tell you now than have you find out after you have paid.
One password prompt, if you have no Python
Double-click the installer and it handles the lot: it fetches ffmpeg quietly in the background, and if Python is missing it downloads Apple's official installer and opens it for you. That one asks for your Mac password, because every Python installer does. If you have already got Python, you will not see it at all.
One setting to check on first run
Step 1 blades your timeline by sending Resolve its own Add Edit shortcut, so
the plugin needs to know what yours is set to. Default is usually cmd+B. If it does
not match, nothing gets cut and you will wonder what you did wrong. It is the single most common
setup issue, it is on the first page of the guide, and it takes about fifteen seconds to fix.
No Terminal, no Homebrew, no hunting down dependencies. Double-click it and get on with the edit.
FAQ
Questions, answered straight.
Does it work on Windows?
Not yet. macOS only for now, Apple Silicon and Intel.
Does it work with the free version of Resolve?
Yes, fully. Resolve 18.5 or newer, free or Studio.
Will it wreck my timeline?
Everything it does is a normal Resolve edit, so ⌘Z undoes all of it. On step 1 you can also run “Just mark them” to see exactly what would be cut before anything is touched.
Do I have to use all four steps?
No. Skip any step you do not want. The step strip at the top lets you jump straight to the one you came for.
Can I try the interface before installing it properly?
Yes. The download includes Preview UI.command, which runs the whole interface against a fake timeline so you can have a click around without pointing it at a real edit.
Do I need to know Terminal or how to code?
No, never. The installer fetches ffmpeg by itself and walks you through Python if you need it. Nothing gets typed into a Terminal.
How do I get updates?
Free for the lifetime of the product. Current version is 0.3.3.
Can I use it on client work?
Yes. Single-user licence covering every machine you personally work on, laptop and studio both. Just do not redistribute it.
Get to the fun bit faster.
Four steps, one window, and the admin done before you have finished your coffee.
Buy The A-Roll Helper